
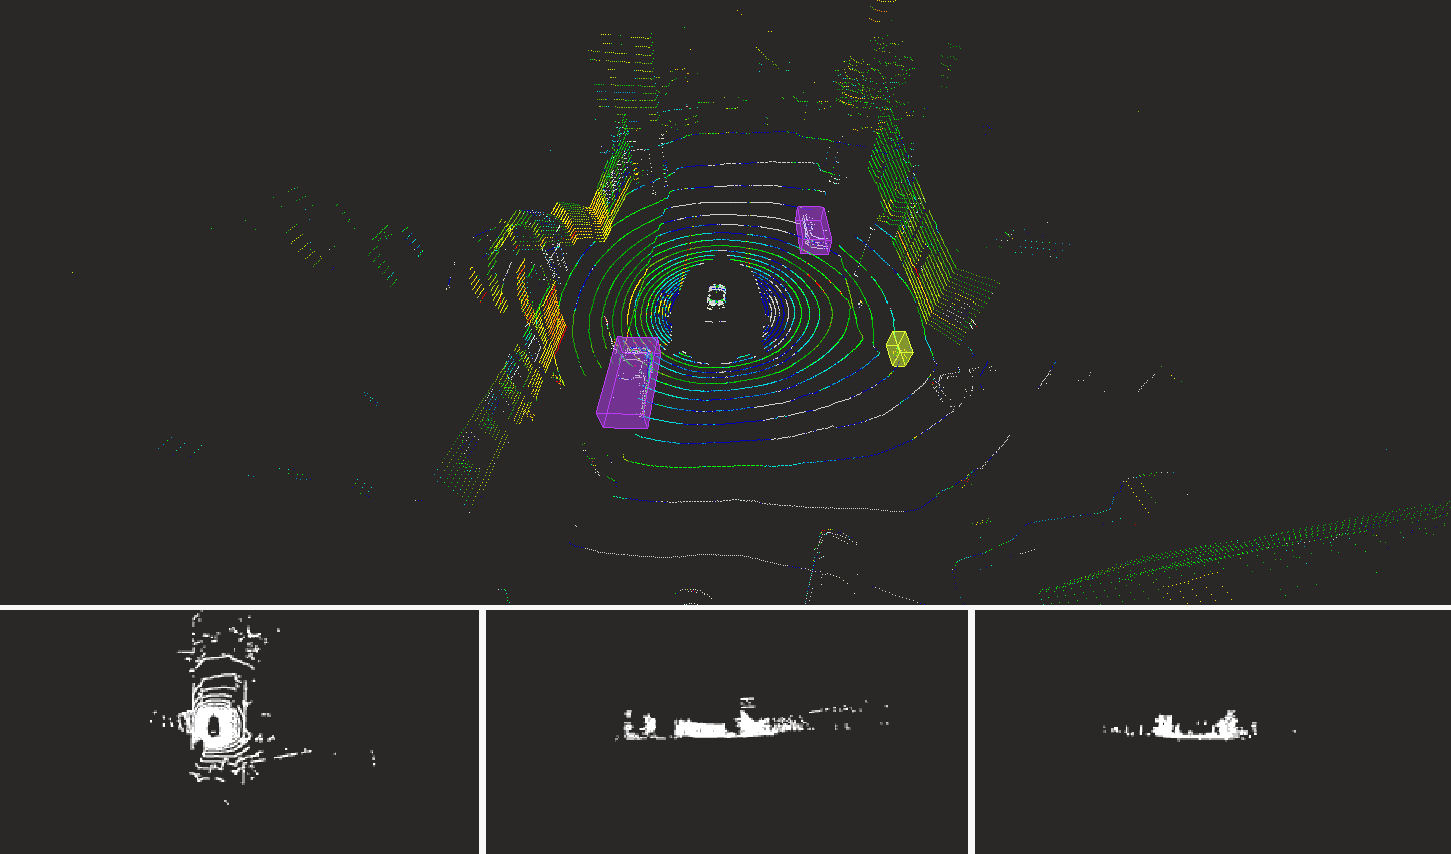
3D data is difficult to navigate and even more difficult to annotate. Part of the problem is that unlike 2D images, you don’t see all your data in a single view. Instead, you have to navigate and isolate small parts of a scene that are of interest to you.
We built the Mindkosh platform with lessons from our own experience labeling data for the Autonomous industry. We felt that the complexity of 3D pointclouds required a more nuanced approach when building tools to interact with them. At the same time, we felt that the plethora of tools and widgets, meant to make the process easier, ended up confusing most users, which meant that teams needed long training sessions to truly understand the process of annotating the pointclouds. Our focus has been and continues to be, to fix both these problems, and provide users with a simple-to-use annotation platform that works well with the 3D nature of the data.
3D Pointcloud navigation
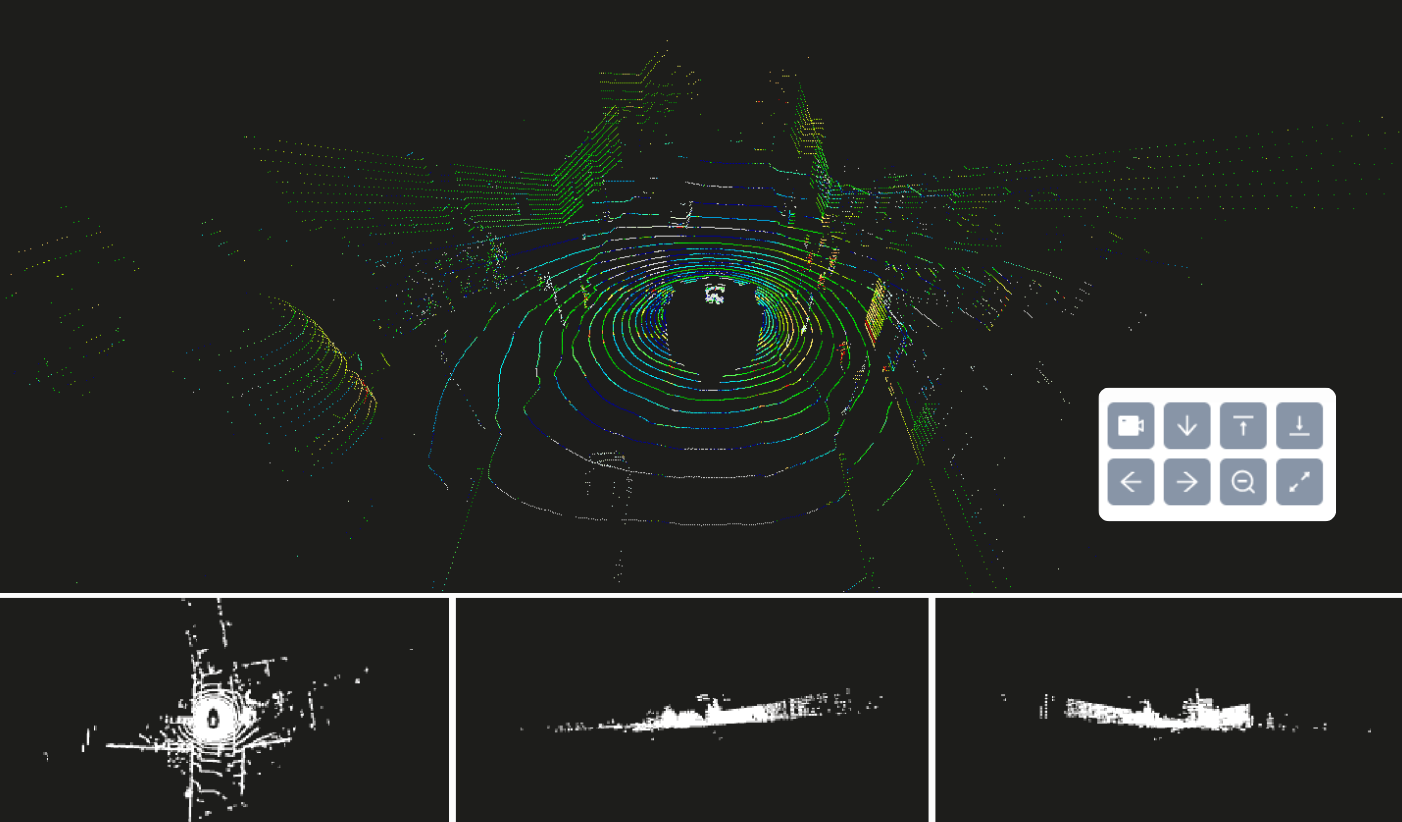
Annotation of 3D pointclouds requires annotators to constantly navigate through 3D scenes, rotating and panning through them to find the object of interest and bring them into focus. To aid in this process, we have added a few tools to handle camera views and adjust how the pointcloud looks.
Camera views
Choose between top, behind, left, right and top camera views. Clicking on any of these buttons resets the current position and shows you the pointcloud from one of these preset views.
Adjustable point size
Adjust the size of points in the pointcloud. This can be very helpful of an object has only a few points and it's difficult to differentiate them from other objects.
Distance attenuation
Viewing large pointclouds at once can be overwhelming. Distance attenuation allows you to filter points that are far away. As you zoom into the pointcloud, more and more points are made visible.
In addition to these tools, if intensity values are present in the uploaded PCD files, these are automatically mapped to colors to help you differentiate between objects. Intensity values are based on how reflective a surface is. For example, road signs, which are shiny so they can be seen at night, usually have high intensity values. On the other hand, roads, which tend to be darker in color usually have low intensity values. This contrast in values can be leveraged to paint a scene with different colors, which can help you quickly understand a scene and identify an object. We are adding more colormaps very soon, so keep an eye out for updates!
Magic Select
Placing a cuboid at the right location in a 3D scene is error prone and time-consuming. To solve this problem, we introduce a new method of cuboid placement called Magic Select.
With Magic select, you can simply draw a rough outline around an object, and the tool automatically draws a cuboid around all the matching points within the boundary. In our own experiments, this feature alone has led to an improvement in our cuboid annotation time by up to 3x, compared to traditional methods.
In cases where an object is isolated from other objects, a single selection can create a perfect cuboid without any need for adjustments. In other other cases small adjustments can be easily made.
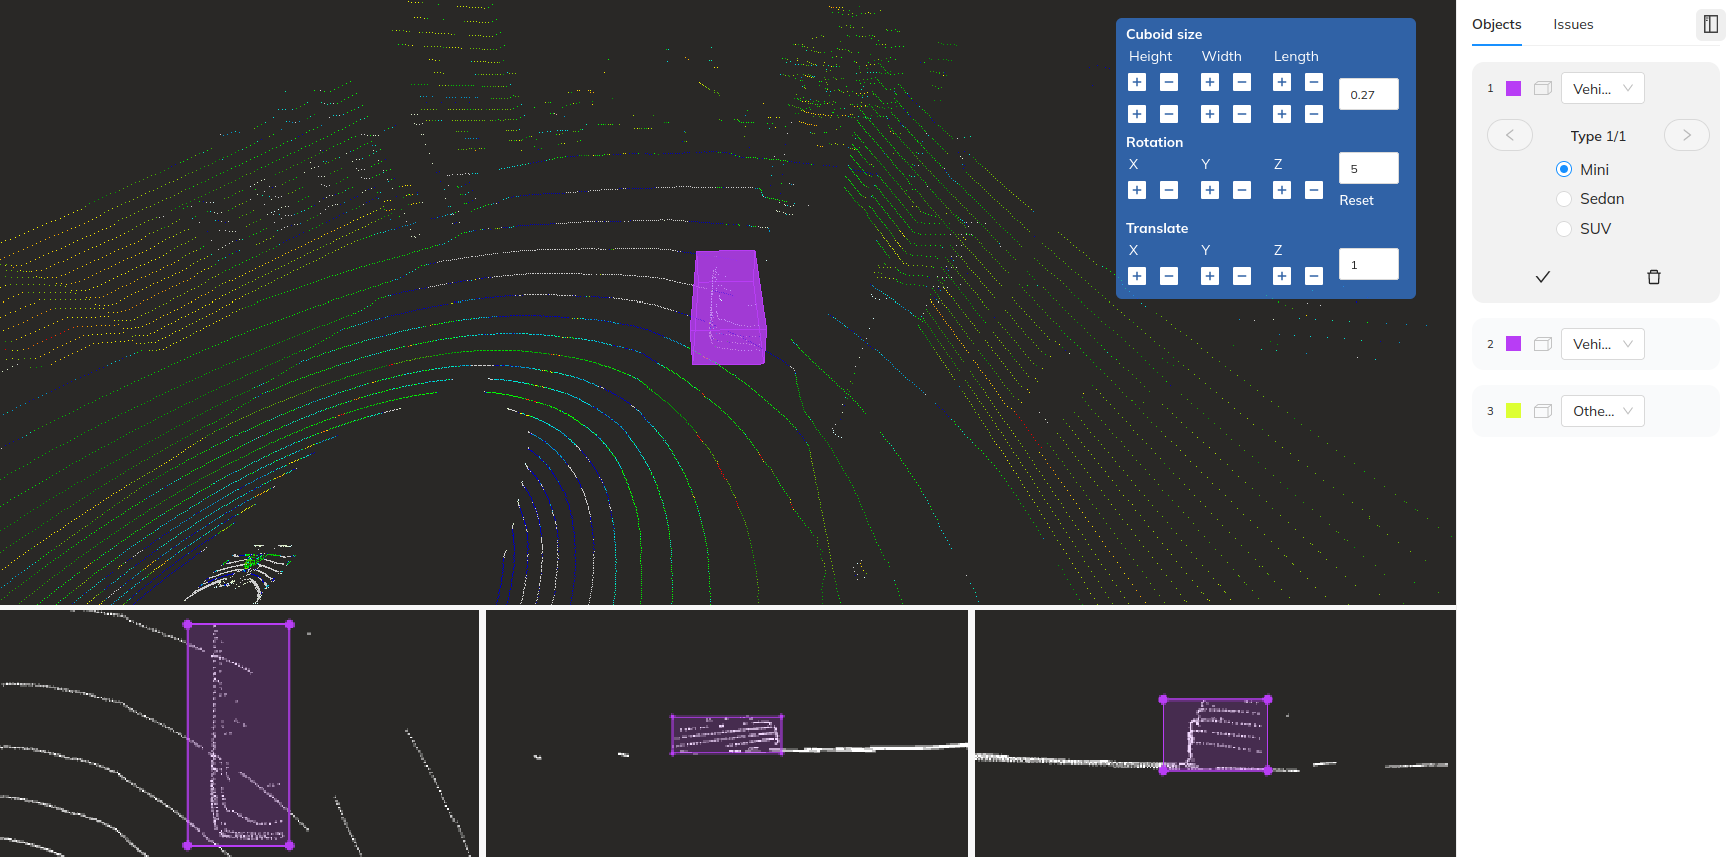
3D Cuboid Annotation
Top, Side and Front views
Once a cuboid object has been created, you can view it in top, side and front views. Other objects that could potentially block the view are removed, giving you a focused view of the object. These cuboids can be easily adjusted by dragging the corners of the planes in the top, side and front views.
Cuboid adjustments
You can also adjust the size, rotation and the position of the drawn cuboid using the resize panel that appears when an object is selected. You can set the step size of each property in this panel, which means that you can adjust how much the size, rotation or position is changed when you click on the +/- buttons. This allows you to do both - be very precise with changes to carefully adjust the cuboid, as well as make large changes with a few clicks.
Shortcuts
All the above adjustments can also be made using convenient shortcut keys, further speeding up annotation.
Attributes
When setting up labels, you can add attributes like Size, color etc. and provide pre-set values that your team can choose from. These attribute values can be updated through the object sidebar on the right.
3D cuboid tracking
In many cases you will want to track an object as it moves through the scene. Combined with Magic select and automatic tracking, you can quickly track an object accurately using the following features.
Automatic Interpolation
Create a cuboid the first time it appears, adjust its location in the last frame it appears in, and you are done!
Our tracking tool automatically adjusts the cuboids in all the frames in between. If you further adjust the cuboid in any frame, cuboids in all other frames are automatically adjusted too.
This is a huge time saver, and in our own experiments we have seen the annotation time reduced 8x, compared to annotating each frame separately.
Attributes
Just like cuboids, you can also add attributes in tracked cuboids. In addition, you can specify whether an attribute can change over frames, or it should stay the same. For, eg. the size of an object will probably stay the same throughout the scene. Marking it immutable will mean that if a user updates the value in any frame, attributes values for that object in all other frames are also updated.
Segmentation
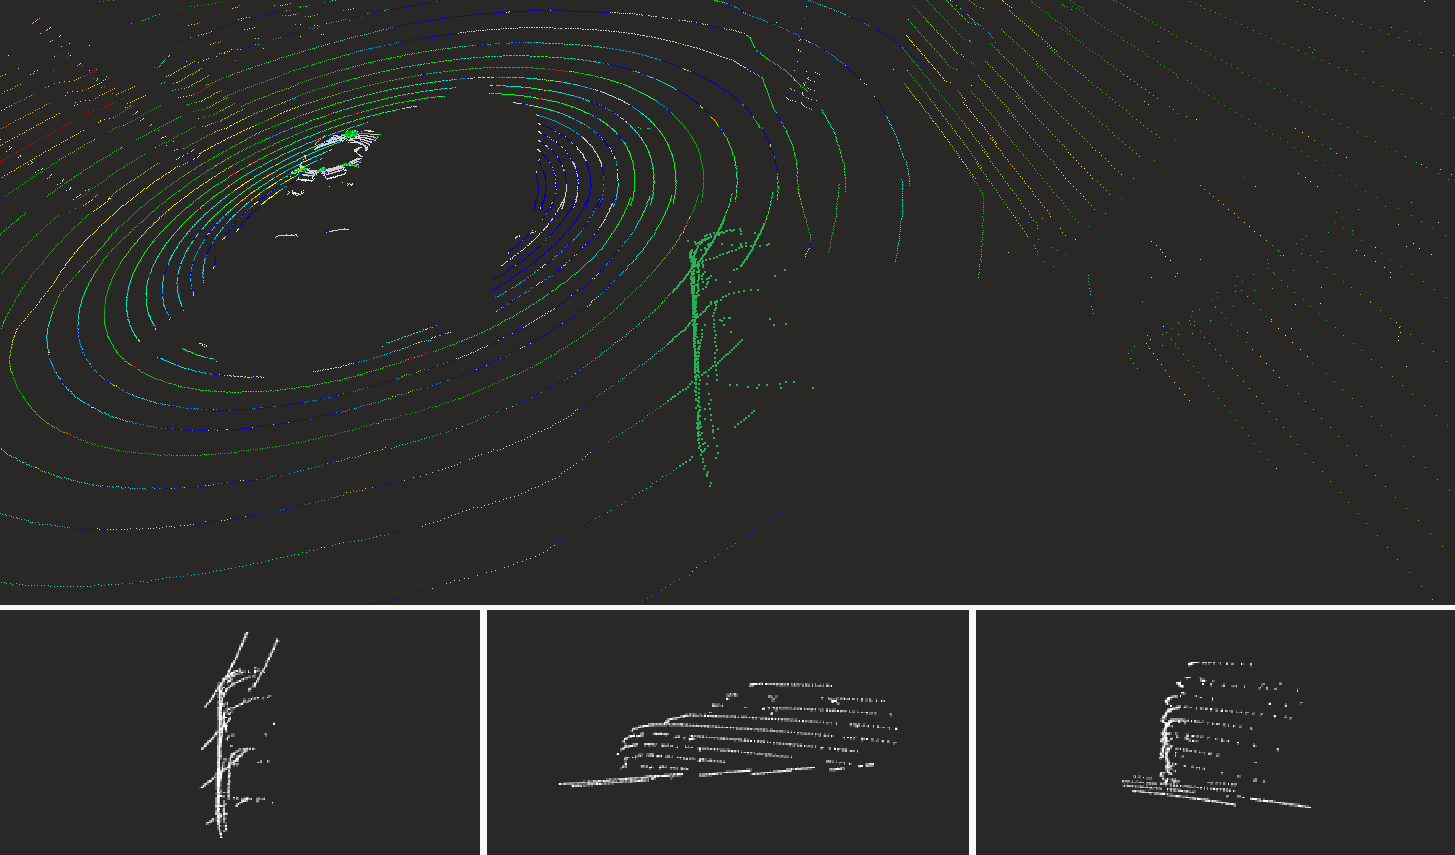
You can create pointcloud segmentations by using the lasso tool. We found that traditional methods of using brushes to select points belonging to an object can be error prone. With the lasso tool, you draw a rough boundary, just like you do to create a cuboid. Once this initial selection is made, you can select areas you want to add to or remove from your current selection using a similar method. This reduces friction and does not need you to be super accurate with your mouse movements.
Just like in cuboids, once a segmentation object has been created, you can view its points from top, side and front views, isolated from all other points in the pointcloud.
There are many more interesting features(like separating ground points) coming very soon, so if you would like us to inform you of any new developments and features, please subscribe to our newsletter below.
The platform is absolutely free to start out, so if you would like to see all of this in action for yourself, click here to register and try the platform out today!